【GAS】GASでZaimAPIを操作する覚書
GASからZaimAPIを操作する機会があったのですが、わかりづらかったので手順をメモ…
Zaim側の設定
開発者アカウントの準備
Zaim Developer Centerにアクセスし、開発者登録してログインもしておく
アプリケーションを作成
Zaim Developer Centerから自分のZaimの情報にアクセスするためのアプリケーションを作成する。

※「家計簿へのアクセスを永続的に許可する」にチェックを入れないと24時間ごとに認証が必要になる
作成した後に発行されるコンシューマ IDとコンシューマシークレットをコピーしておく
GASの準備
使用するライブラリ
GASからZaimの情報を取得するにはOAuth認証が必要なので、ライブラリのOAuth1 for Apps Scriptを使用します
Google公式のLibraryでOAuth1で認証・認可を行うためのライブラリです。
使用するコード
取得したコンシューマIDとコンシューマシークレットをプロジェクトプロパティに設定して利用します。
var SP = PropertiesService.getScriptProperties();
var CONSUMER_KEY = SP.getProperty("CONSUMER_KEY");//取得したコンシューマID
var CONSUMER_SECRET = SP.getProperty("CONSUMER_SECRET");//取得したコンシューマシークレット;
/**
 * Authorizes and makes a request to the Zaim API.
 */
function run() {
  var service = getService();
  if (service.hasAccess()) {
    var url = 'https://api.zaim.net/v2/home/money';
    var response = service.fetch(url, {
      method: 'get'
    });
    var result = JSON.parse(response.getContentText());
    Logger.log(JSON.stringify(result, null, 2));
  } else {
    var authorizationUrl = service.authorize();
    Logger.log('次のURLを開いてZaimで認証したあと、再度スクリプトを実行してください。: %s',
        authorizationUrl);
  }
}

/**
 * Reset the authorization state, so that it can be re-tested.
 */
function reset() {
  var service = getService();
  service.reset();
}

/**
 * Configures the service.
 */
function getService() {
  return OAuth1.createService('Zaim')
      // Set the endpoint URLs.
      .setAccessTokenUrl('https://api.zaim.net/v2/auth/access')
      .setRequestTokenUrl('https://api.zaim.net/v2/auth/request')
      .setAuthorizationUrl('https://auth.zaim.net/users/auth')

      // Set the consumer key and secret.
      .setConsumerKey(CONSUMER_KEY)
      .setConsumerSecret(CONSUMER_SECRET)

      // Set the name of the callback function in the script referenced
      // above that should be invoked to complete the OAuth flow.
      .setCallbackFunction('authCallback')

      // Set the property store where authorized tokens should be persisted.
      .setPropertyStore(PropertiesService.getUserProperties());
}

/**
 * Handles the OAuth callback.
 */
function authCallback(request) {
  var service = getService();
  var authorized = service.handleCallback(request);
  if (authorized) {
    return HtmlService.createHtmlOutput('認証できました!このページを閉じて再びスクリプトを実行してください。');

  } else {
    return HtmlService.createHtmlOutput('認証に失敗');
  }
}
データを取得する実行手順
gasでrun()を実行してログを表示
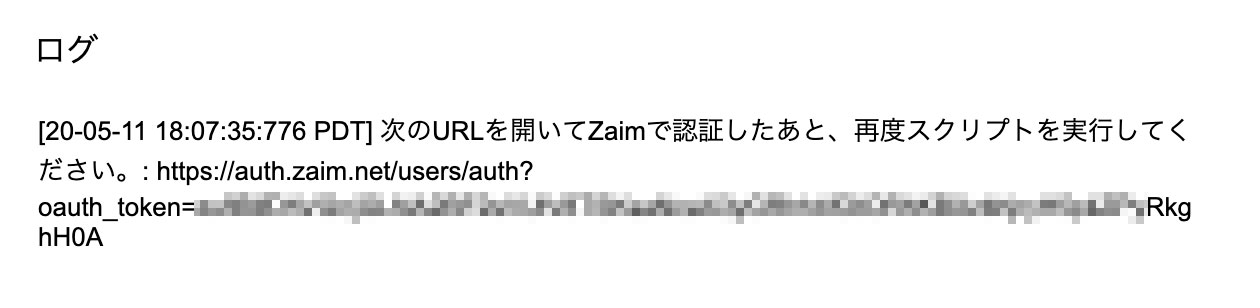
表示されているURLをコピーしてアクセスします
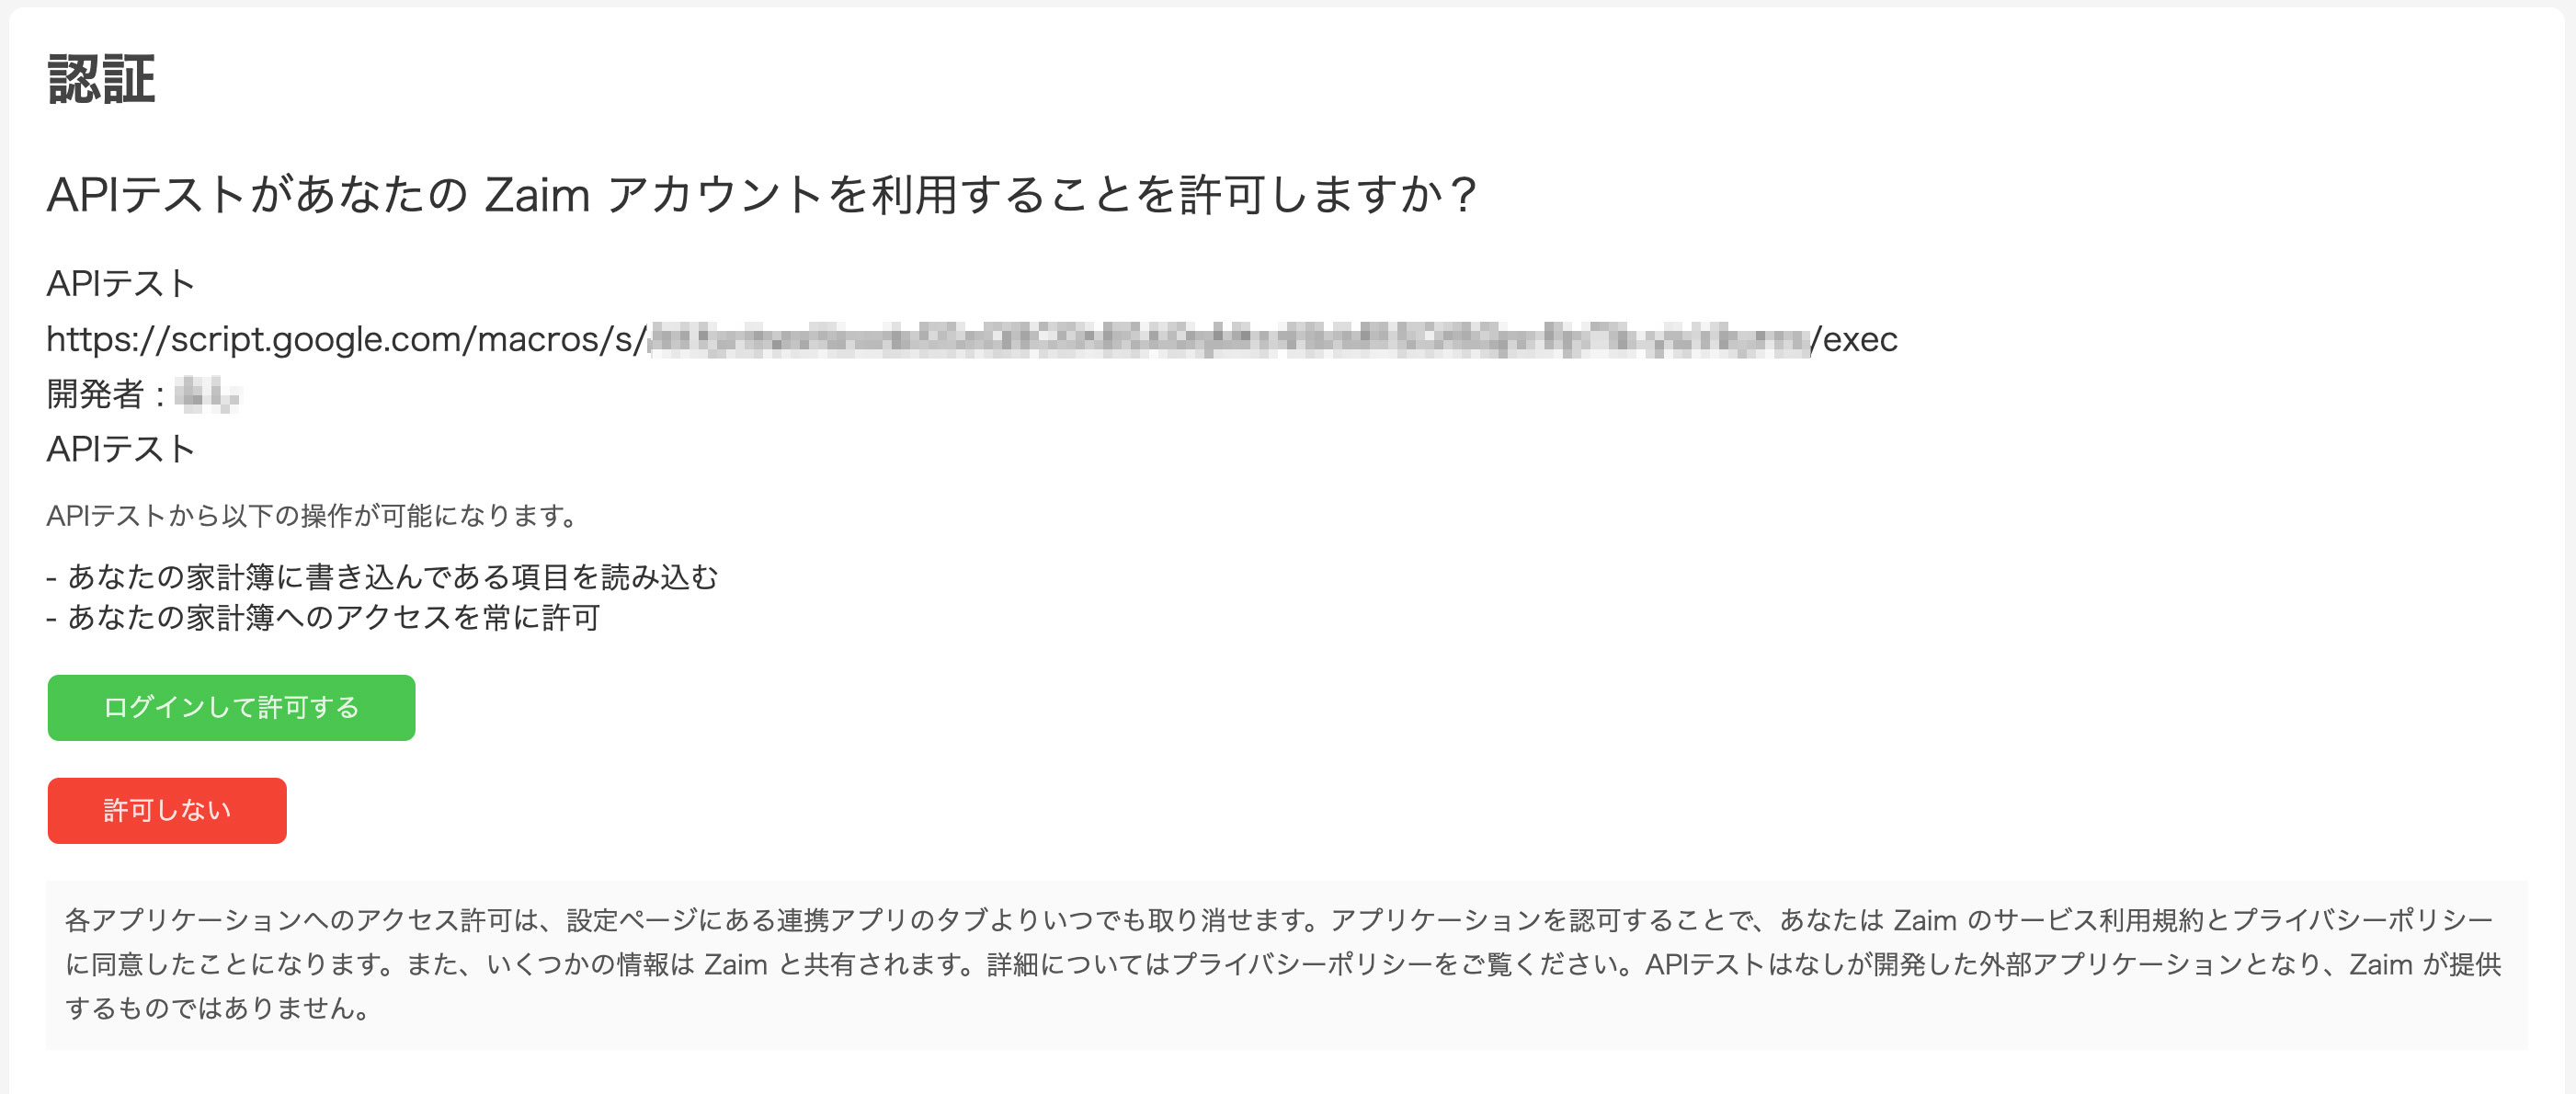
認証画面が出てくるのでログイン

認証が完了したらスクリプトに戻って再度run()を実行
[20-05-11 18:08:46:993 PDT] ログ出力のサイズが大きすぎます。出力を切捨てます。 {
  "money": [
    {
      "id": ○○○○,
      "user_id": ○○○○,
      "date": "2020-05-08",
      "mode": "income",
      "category_id": ○○○○,
      "genre_id": 0,
      "from_account_id": 0,
      "to_account_id": ○○○○○,
      "amount": 1000,
      "comment": "○○○○",
      "active": 1,
      "created": "2020-05-08 17:57:14",
      "currency_code": "JPY",
      "name": "",
      "receipt_id": 0,
      "place_uid": "",
      "place": ""
    }
すると今度は認証画面ではなくzaimに登録されているデータがjsonで返ってきます